
By NaJade · DJ in Bangkok · Published October 27, 2026
This guide is part of Pioneer DJ controllers: the complete guide.
Most controllers don’t die suddenly. They get slowly choked by dust, sweat and the odd splash of beer.
A DJ controller lives a rough life: fingers on it for hours, drinks next to it, dust and humidity in between gigs — and in Bangkok, a lot of humidity. A simple cleaning routine keeps faders smooth, knobs quiet and jog wheels responsive, and it can save you from the classic crackle in the middle of a mix. The good news: it takes ten minutes and a few cheap tools. The bad news: the wrong product can do more damage than the dirt.
To clean a DJ controller, power it off and unplug it, blow dust out with short bursts of compressed air, then wipe the surface with a soft microfibre cloth that is barely damp. Never spray liquid directly onto the unit. For scratchy faders, use a dedicated fader treatment on a cotton swab, as the manufacturers recommend.
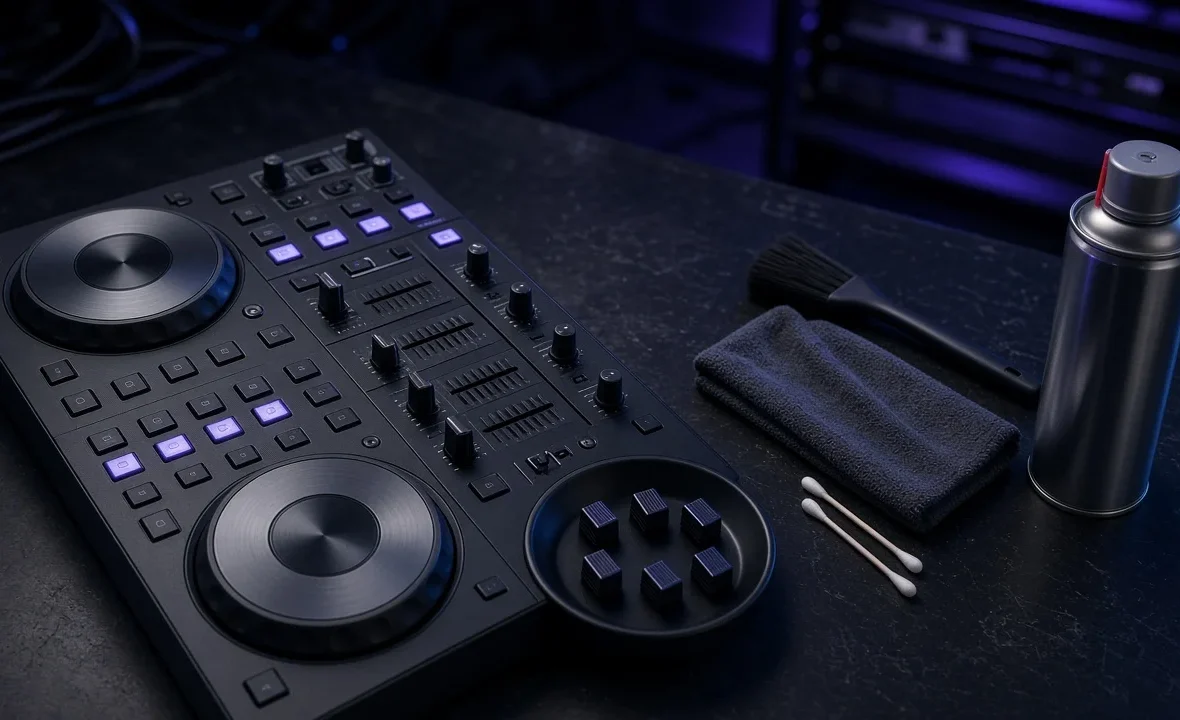
What You Need
- A soft microfibre cloth (two is better: one damp, one dry).
- Compressed air or a small hand blower.
- Cotton swabs for gaps and fader slots.
- A soft brush, like a clean make-up or paint brush, for dust between knobs.
- Isopropyl alcohol (for the cloth, not the controller) for greasy fingerprints, if your manual allows it.
- A dedicated fader treatment such as DeoxIT F5, only if faders are scratchy.
- A small cup or bag to keep knob and fader caps safe.
Avoid household sprays, glass cleaners and anything abrasive. Most techs also advise against ordinary WD-40 inside faders, because it is a solvent rather than a fader lubricant and can wash out the factory grease.
Step by Step: A Routine Clean
- Power off and unplug everything — power, USB and audio cables.
- Blow out loose dust with short bursts of compressed air, holding the can upright. Work across the knobs, pads, buttons and fader slots.
- Brush between the knobs to lift dust that air alone won’t move.
- Wipe the surface with a microfibre cloth that is barely damp. Spray or dab the cloth, never the controller.
- Clean the jog wheels with the same damp cloth, then dry them so they don’t feel sticky.
- Dry everything with the second cloth and leave it uncovered for a few minutes before plugging back in.
Doing this once a month — or after any sweaty gig — is plenty for most home setups. Then cover it. A dust cover or a DJ flight case does more for long-term reliability than any cleaning product.
Fixing Scratchy Faders and Knobs
If a channel fader or crossfader crackles, cuts out, or makes the volume jump, dirt or dried lubricant is usually the cause. Denon DJ’s official fader maintenance guide describes a careful method, and Numark publishes the same process for its controllers:
- Power off and unplug the controller, then pull off the fader caps.
- With the fader at the top, blow compressed air into the slot from bottom to top; move it down and blow from top to bottom.
- Pour a little fader treatment into a bottle cap — don’t spray it into the slot — and dip a cotton swab lightly.
- Wipe along the slot in both directions, gently. A soaked swab is too much.
- Leave the unit upside down on a soft cloth to dry. Denon recommends allowing at least an hour.
- Refit the caps, power on and test for crackle.
If a fader still misbehaves after cleaning, it may be worn out. Many controllers have replaceable faders, but on newer units contact the brand’s support before opening anything, especially under warranty. Audio problems that aren’t mechanical are covered in how to fix DJ audio dropouts.
What Not to Do
| Don’t | Why | Do instead |
|---|---|---|
| Spray cleaner onto the controller | Liquid runs into faders and circuit boards | Dampen the cloth |
| Use WD-40 or household lubricants in faders | Can strip factory grease and attract dust | Use a proper fader treatment, sparingly |
| Use paper towels or rough cloths | Can scratch displays and jog surfaces | Use microfibre |
| Clean while it’s powered | Risk of shorts and accidental input | Unplug everything first |
| Store it uncovered | Dust settles into every slot | Use a cover or case |
| Keep drinks on the same table | One spill can end the controller | Put drinks on a separate surface |
Humidity is the hidden enemy in tropical cities. If your room gets damp, store the controller somewhere with air-conditioning or a dehumidifier, and don’t move it straight from a cold, air-conditioned room into hot outdoor air before powering it on — let any condensation clear first. The same care applies to records; see how to clean vinyl records.
A Note From NaJade
My first controller was a second-hand unit bought in Bangkok, and the previous owner had clearly DJed with a drink balanced right next to the mixer. Two channel faders crackled from day one. I tried spraying a general-purpose lubricant into them — a mistake — and made it worse. What finally worked was patience: compressed air, a proper fader cleaner on a swab, and leaving it to dry overnight. Now I wipe my gear down after every gig and keep it covered at home, which in this humidity makes a real difference. Look after the controller and it will look after you on the nights it matters.
Related: best DJ controller for beginners, home DJ setup guide, DJ flight cases, and where to buy DJ gear in Bangkok.
Frequently Asked Questions
How do you clean a DJ controller safely?
What can I use to clean DJ faders?
Can I use WD-40 on DJ faders?
Why is my DJ controller fader crackling?
How often should I clean my DJ controller?
Can I use alcohol wipes on a DJ controller?
About the Author
NaJade is a Bangkok-based DJ playing progressive house, melodic EDM, pop, and Thai music across clubs, rooftops, and weddings in Thailand. He teaches beatmatching and mixing to beginners both in person in Bangkok and online over Zoom. When he’s not behind the decks, he’s documenting the journey on YouTube, Instagram, and TikTok.